Sunday, February 8, 2015

Sriracha-Cream Seared Alaskan Cod recipe

I originally used catfish the first time I made this recipe. Have I ever mentioned I don't eat fish a whole lot? Yeah, I'm not a fan. I think I've only tasted milkfish, tilapia, cod, a little bit of canned tuna, and a small piece of salmon (and I mean maybe the size of a fingernail). Oh, and fried perch once. So I really don't know what other fish taste like, and I sure as heck didn't know what catfish tasted like before I used it for this recipe! I hated it, but my husband didn't mind it. His palate for fish is more diverse than mine. In fact, he was the one who picked up the catfish at the store.

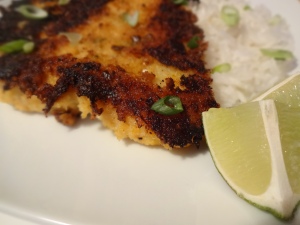
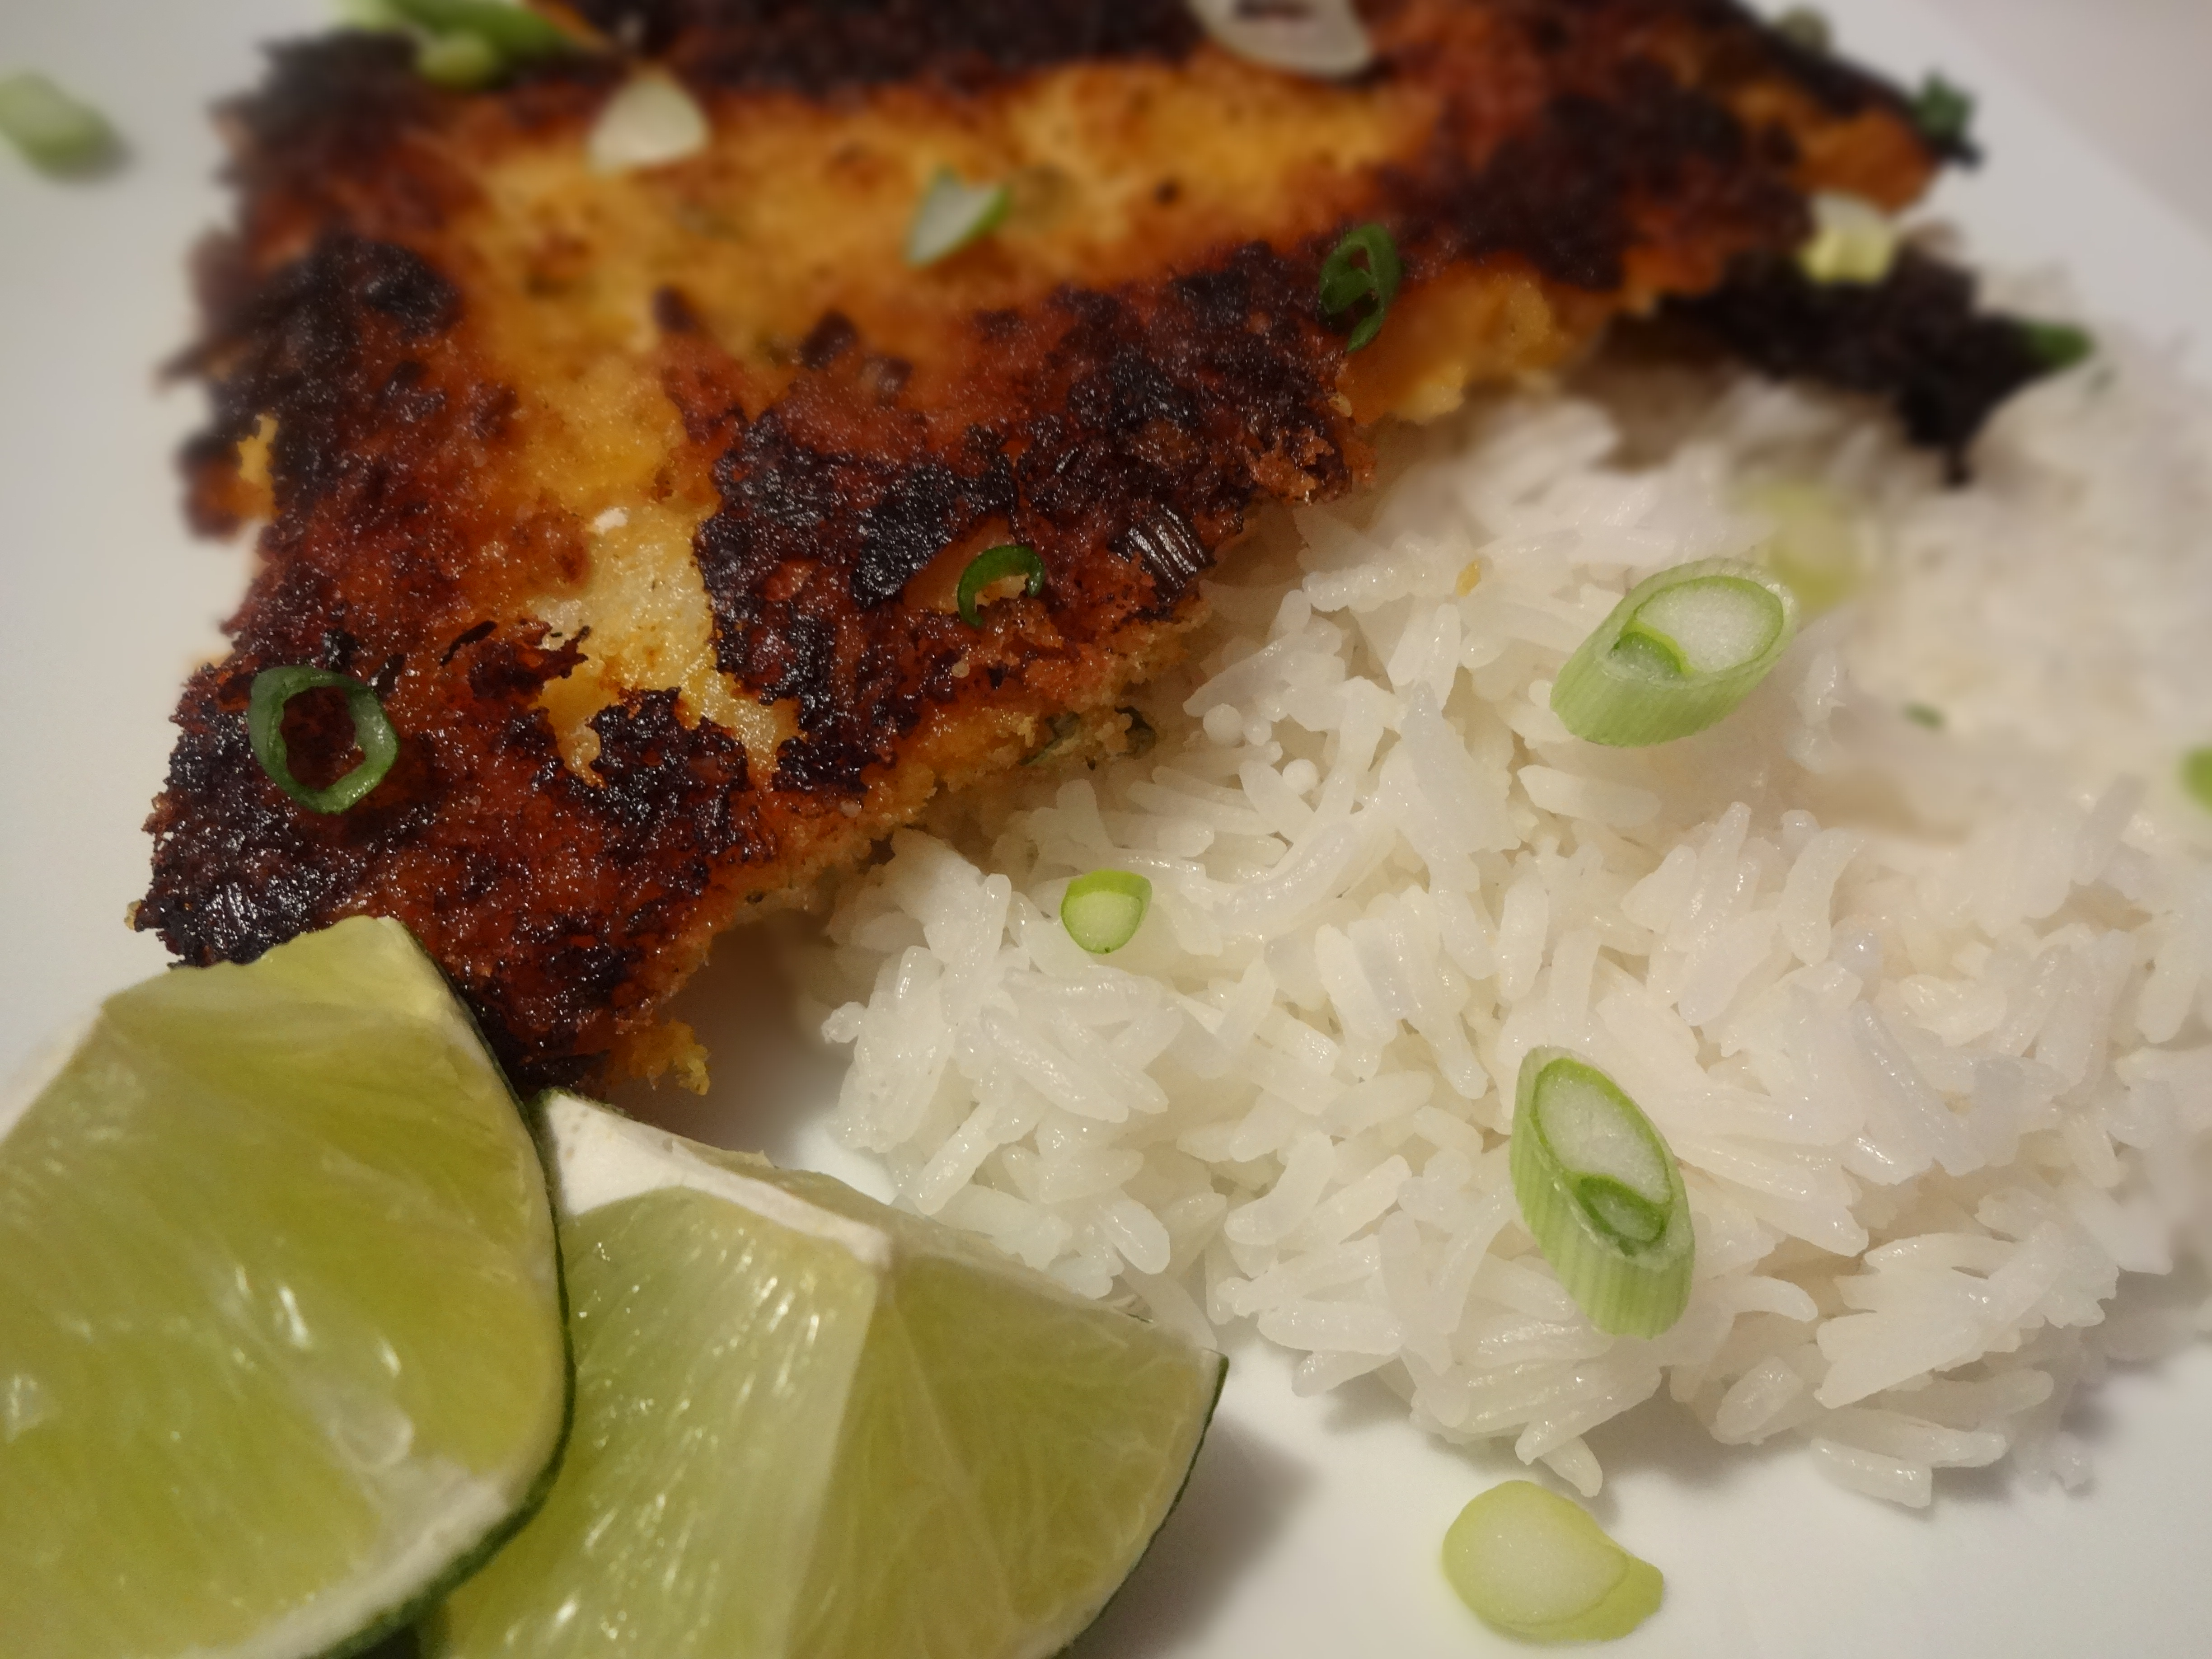
When I made this with catfish, I seared one side of the fillets and then broiled it the rest of the way. But this time with the cod, I seared one side and then baked it the rest of the way. Both times, I squeezed lime juice over the top before eating it. When my husband squeezed lime juice on the cod, he said it tasted like fish tacos. I wouldn't know.. I've never had fish tacos!

Sriracha-Cream Seared Alaskan Cod

For the Alaskan Cod
ingredients:
• 2 (1 lb each) Alaskan Cod fillets, halved crosswise or cut into thirds
• kosher salt
• freshly ground black pepper
• 6 tbsp olive oil, divided use
For the Sriracha-Cream Sauce
ingredients:
• ¼ cup sour cream
• 3 tbsp Sriracha
• 1 tbsp Japanese mayonnaise (Kewpie)
• 2 tsp lime juice, freshly squeezed + wedges for garnish
• 1 tsp honey, preferably raw
For the Breading
ingredients:
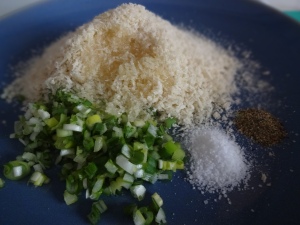
• 1 cup panko bread crumbs
• 3 tbsp olive oil
• 2 scallions, finely chopped + some sliced for garnish
• ½ tsp kosher salt
• ¼ tsp ground black pepper
instructions:
1)  Let fish come to room temperature for 15 minutes before cooking. Preheat oven to 425° F. Place a 12-inch cast iron skillet (or 2 cast iron skillets) in the preheating oven.
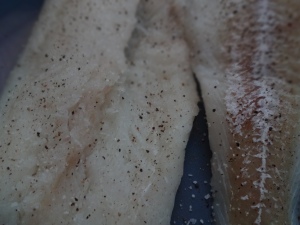
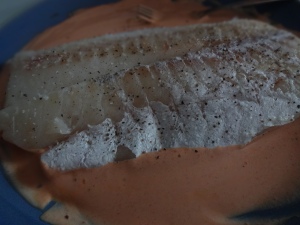
2)  Rinse fish and pat dry with paper towels. Season fish on all sides with salt and pepper.
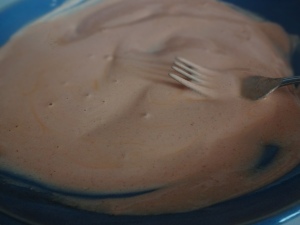
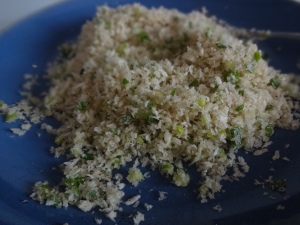
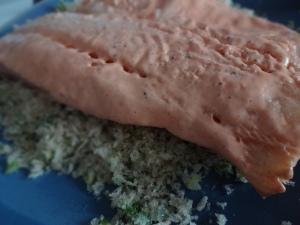
3)  Mix all the ingredients for Sriracha-Cream sauce on a plate, and the ingredients for the breading in another.
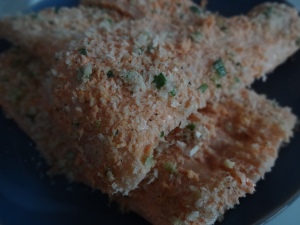
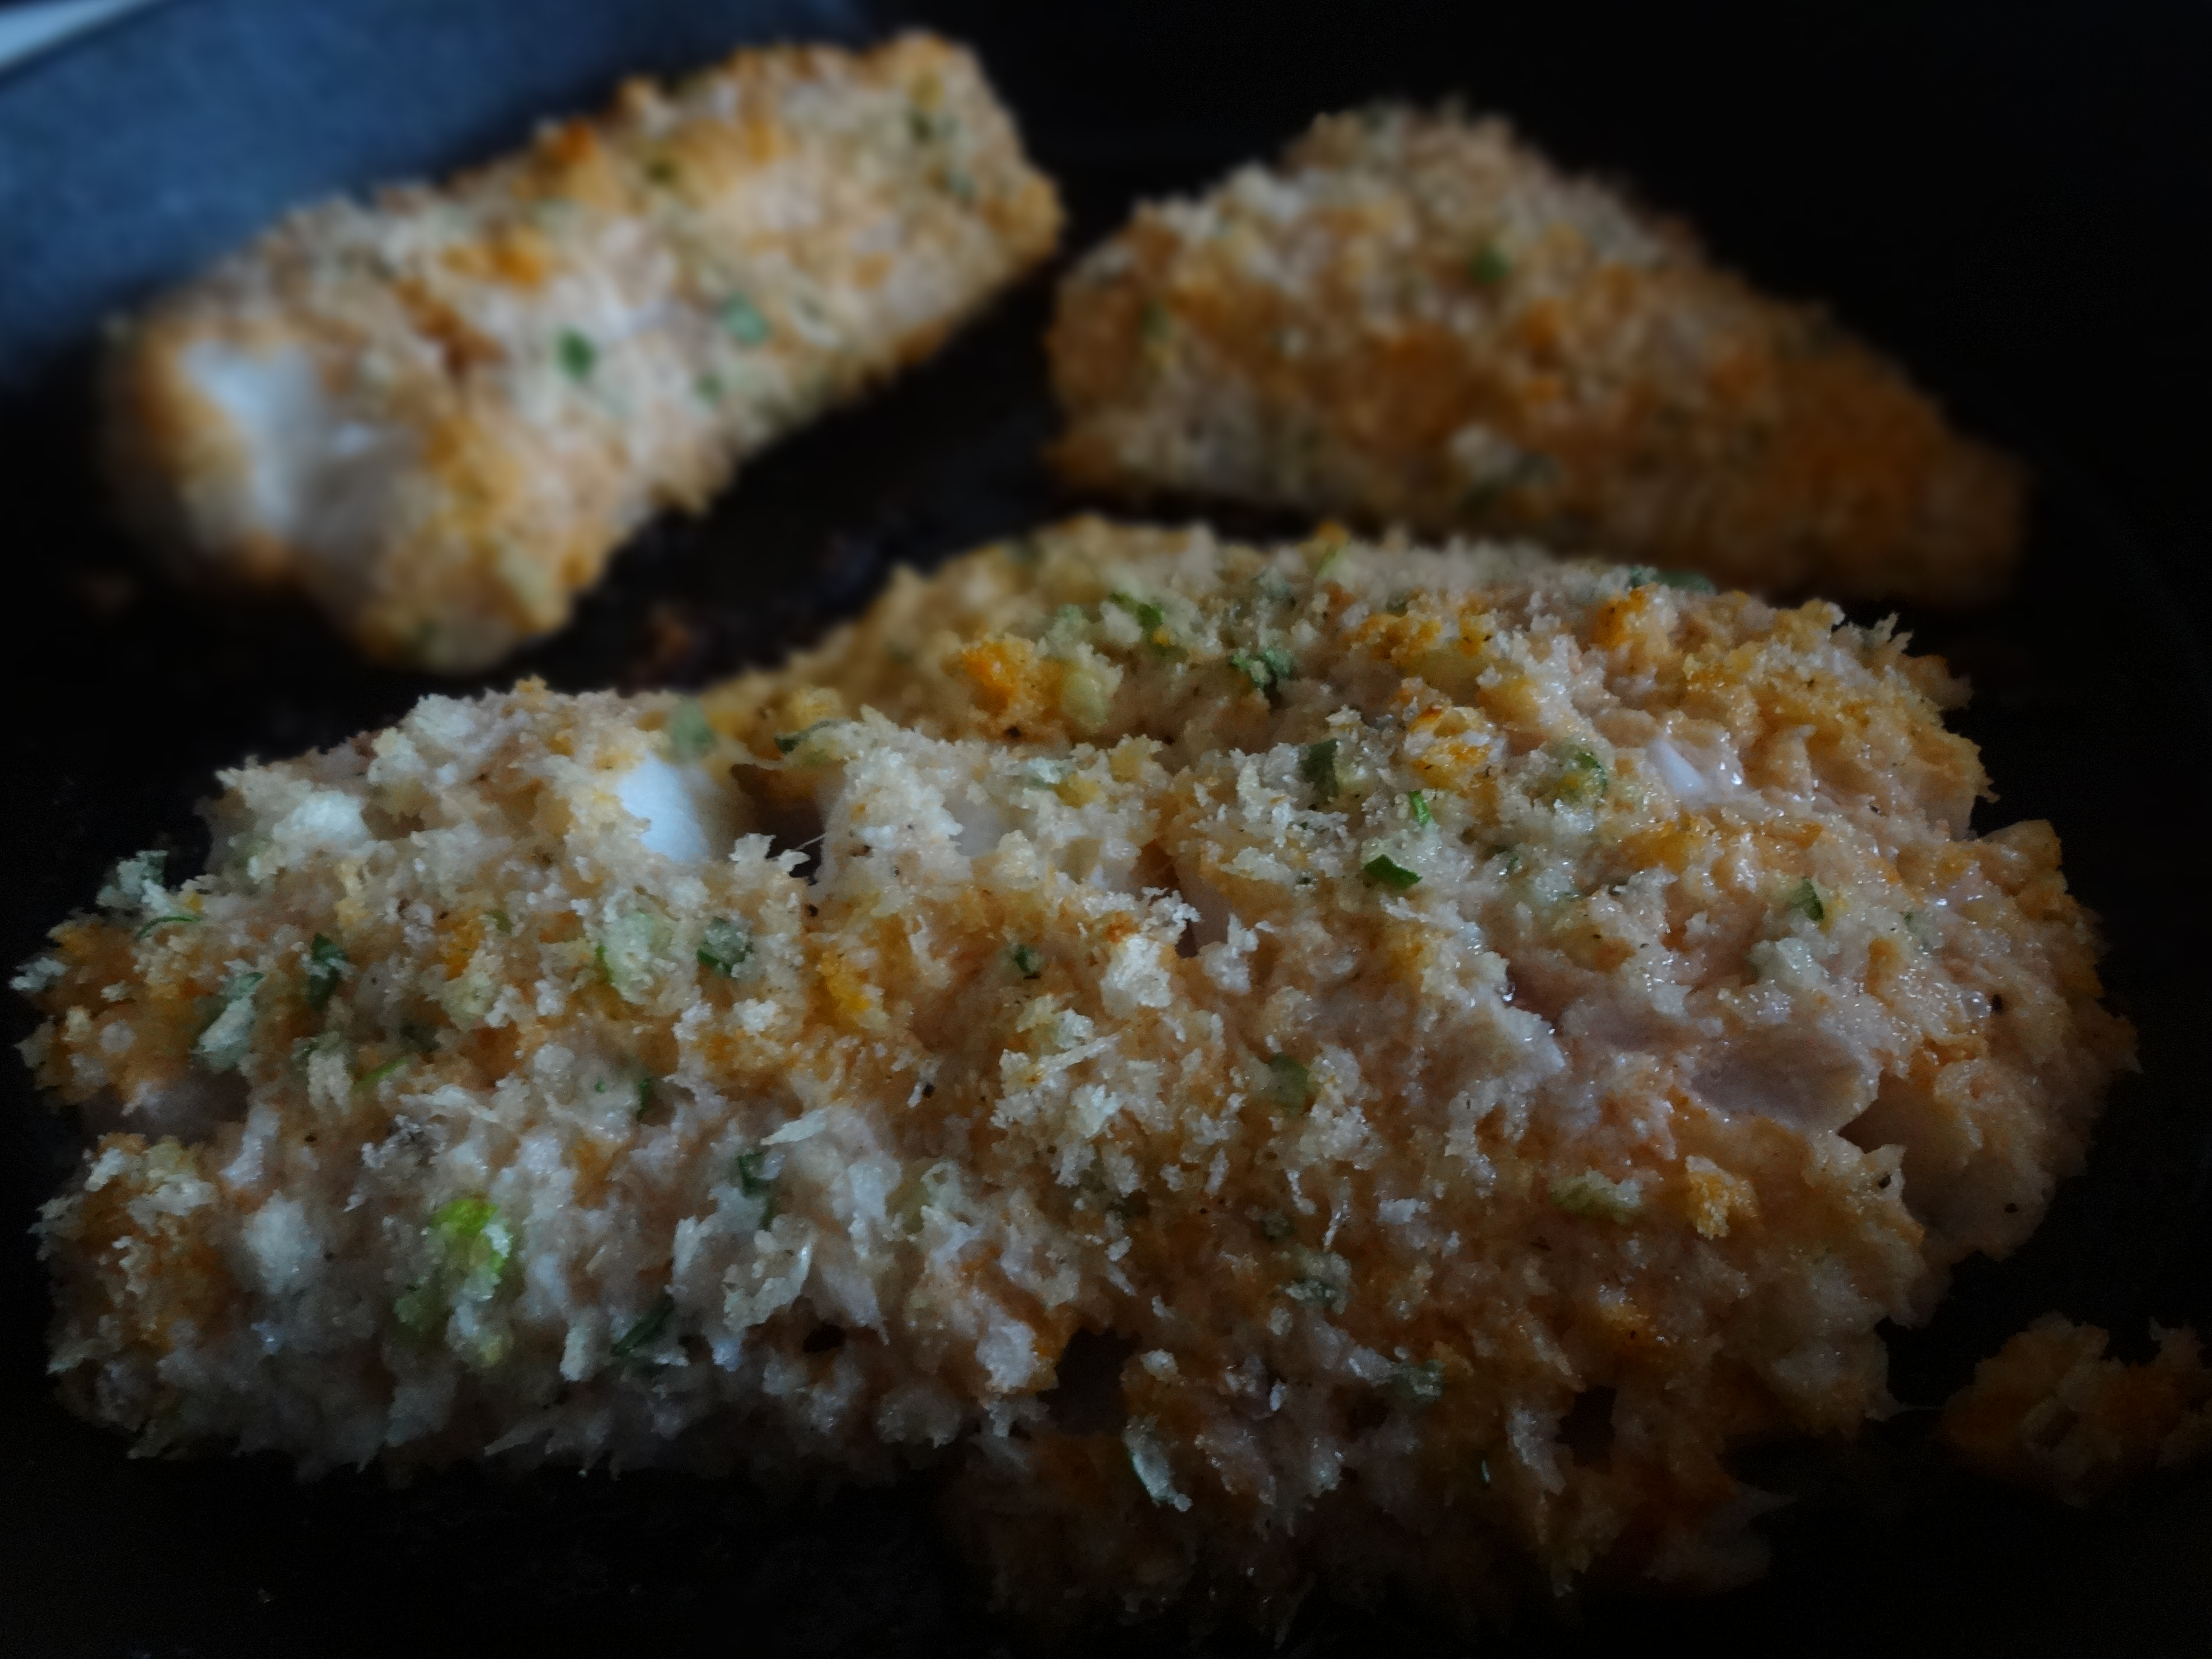
4)  Coat fish with Sriracha-Cream sauce on both sides, then coat with the panko mixture. Put breaded fish on a wire rack or plate.
◘ tip: When breading, lightly press the fish down to make sure the panko sticks to the fish.
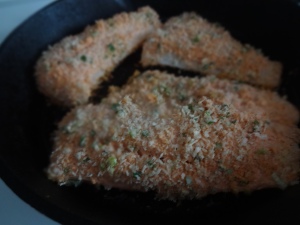
5)  Remove skillet(s) from the oven and place over medium-high heat. Add 3 tbsp olive oil in each skillet to heat up (if using only 1 skillet, save the other 3 tbsp for later).
6)  Gently add fillets to the pan, remembering not to overcrowd the pan. Sear one side for 3 minutes. At this point, you can either carefully flip the fillets to sear the other side as well, or transfer the skillet to the oven.
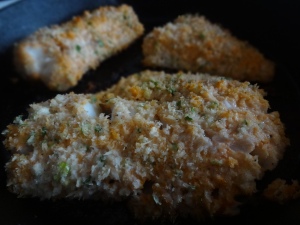
7)  If searing the other side: Flip the fillets and sear the other side for 2 minutes, then transfer the skillet to the oven for 5 minutes.
If not searing the other side: Once fillets are seared on one side, transfer skillet to the oven for 10 minutes.
◘ note: Repeat cooking process for the rest of the fillets if needed.

8)  Place cooked fillets on a serving platter. Garnish with sliced scallions and lime wedges.
◘ tip: If one side of the fish is not seared, place fish seared side up on the plate for better presentation.
DSC04811 DSC04813DSC04814 DSC04818DSC04820 DSC04821DSC04823 DSC04826DSC04834 DSC04856DSC04857

Sriracha-Cream Seared Catfish

Friday, February 6, 2015

Herbed Quinoa recipe

Quinoa is so good for you! It is a good source of protein, calcium, fiber, phosphorus, magnesium, and iron. Eating healthy can be toothsome!

Herbed Quinoa
ingredients:
• 1 cup quinoa
• 1 tbsp unsalted butter
• 1 shallot, diced
• 1 garlic clove, minced
• 2 cups unsalted chicken stock (Kitchen Basics)
• 1 tsp dried basil
• ½ tsp dried oregano
• 1 tsp kosher salt
• freshly ground black pepper
• 2 tbsp parsley, chopped + leaves for garnish

instructions:
1)  Heat butter in a medium saucepan over medium heat. Add shallots and cook for 2 minutes, stirring constantly to prevent it from browning. Add garlic and cook until fragrant, about 30 seconds.
2)  Add quinoa, toast for about 30 seconds. Add the chicken stock, basil, oregano, salt, pepper, and chopped parsley; give it a stir. Bring to a boil. Reduce heat, put the lid on and simmer for 15 minutes.
3)  Fluff quinoa with a fork. Turn the heat off, put the lid back on and let stand for 10 minutes.
4)  Fluff again with a fork before serving. Garnish with parsley leaves.
DSC04943 DSC04939DSC04944 DSC04945DSC04947 DSC04949DSC04952 DSC04956DSC04960

Wednesday, February 4, 2015

Braised Beef Short Ribs recipe

Beef short ribs, I know -- quite expensive. But I hope this recipe is enticing enough for you to try it out. Hey, if you're having a dinner date at home or maybe you're trying to impress someone (in-laws, for instance) this dish will definitely do the trick. You will all feel fancy!

Braised Beef Short Ribs
ingredients:
• 4 lbs beef short ribs, bone in
• 1 tsp + ½ tsp kosher salt + more for sprinkling
• ¼ tsp freshly ground black pepper + more for sprinkling
• 1 tbsp olive oil
• 1 onion, chopped
• 2 celery, chopped (or ½ cup)
• 2 carrots, chopped (or ½ cup)
• 2 tbsp tomato paste
• 3 garlic cloves, minced
• 1 tbsp rosemary, minced
• 1 tbsp parsley, chopped + more for garnish
• 2 dried bay leaves
• ¼ cup red wine
• ¼ cup balsamic vinegar
• 14.5 oz can low sodium beef broth or 8.25 oz Kitchen Basics beef stock
• ¼ cup unsalted chicken stock (Kitchen Basics)
• 6 oz can pineapple juice, shaken well before use (Dole)
• 1 tbsp gochujang
instructions:
1)  Sprinkle short ribs with salt and pepper. Heat olive oil in an oven safe pan/pot with a lid such as a 
dutch oven over medium-high heat. Sear ribs for 3 minutes on each side. Transfer ribs to a plate. Preheat oven to 350° F.
2)  In the same pan still over medium-high heat, add onions, carrots, celery, ½ tsp salt, and ¼ tsp ground black pepper; cook for 3 minutes. Add tomato paste, garlic, rosemary, parsley, and bay leaves; cook for 1 minute.
3)  Deglaze pan with red wine and balsamic vinegar, scraping the browned bits on the bottom of the pan. Cook until liquid is reduced by half, about 4-5 minutes.
4)  Add beef broth, chicken stock, pineapple juice, gochujang, and 1 tsp salt. Bring to a boil.
5)  Once boiling, put short ribs back in the pan and put the lid on. Off the heat and transfer pan to the oven for 1 hour and 45 minutes.
◘ tip: If using a pot with a lid that has a vent hole, cut parchment paper to fit the pot and place it on top of the ribs before putting the lid on.
6)  Take the lid off (and parchment paper, if using) and continue to braise in the oven for 30 more minutes.
7)  Take the pan out of the oven and transfer ribs to a plate, then skim surface fat.
8)  You can either put the ribs back in the pan or put ribs in a serving dish and pour sauce over the top. Garnish with torn parsley leaves.

DSC04763 DSC04786DSC04773 DSC04784DSC04787 DSC04788DSC04789 DSC04790DSC04792 DSC04805DSC04807

Sunday, February 1, 2015

Bossam (Boiled Pork Wraps) recipe

What is Bossam? It is deliciousness wrapped in lettuce! Bossam or Bo Ssäm is a Korean pork dish, usually pork belly, boiled with spices and aromatics until tender. Depending on the cook, the pork is then either roasted, broiled, or seared before thinly slicing it. Bossam is traditionally served with several side dishes: kimchi, garlic, scallions, chili peppers, pickled radish, saeujeot (salted fermented shrimp), ssamjang (wrap sauce), rice, lettuce or napa cabbage to name a few.

I personally served this dish with only 4 side dishes, only because my pantry and fridge isn't exactly stocked with Korean products on a daily basis. I would've loved to have kimchi and pickled radish on the side but my husband isn't a big fan of kimchi and I forgot to put daikon on the list when we went grocery shopping. Reminder: When purchasing Korean items, such as doenjang and gochujang, look for "Product of Korea" stamp.


I think Bossam is best eaten with other people, so share with people you like to be around with!


My recipe calls for broiling the pork belly. We're a military family renting a townhouse, and the appliances that came with the house are a little dated. The broiler is located beneath the oven and it has 3 racks for positioning food to be broiled. Keep this in mind when I start talking about which rack position to use for broiling the pork belly.


Bossam (Boiled Pork Wraps)
For the Pork
ingredients:
• 3-3.5 lbs pork belly
• half of an onion, quartered
• 9 garlic cloves, smashed
• 4" x 2" ginger, sliced
• 4 scallions, cut to 2-inch length
• 2 tbsp doenjang
• 1 tbsp cheongju or sake
• ½ tsp whole or ground black pepper
• water (approximately 8-10 cups)
instructions:
1)  Soak pork in cold water for 30 minutes. Rinse pork, then transfer it to a heavy-bottomed pot. Add all the ingredients into the pot and add water to cover. Bring to a boil over high heat, uncovered.
◘ tip: I added 9 cups of water.
2)  Reduce heat and simmer until tender, about 2 hours. Skim off the scum especially in the first hour of cooking.
3)  Transfer pork to a foil-lined broiler pan to cool.
For the Rub
ingredients:
• 2 tbsp doenjang
• 2 tbsp honey, preferably raw
• 2 tsp gochujang
• 1 tsp garlic powder
• 1 tsp onion powder
• 1 tsp ginger powder
• ½ tsp sesame oil
instructions:
1)  Preheat broiler.

2)  While pork is resting on the broiler pan, mix all the ingredients for the rub in a bowl.
3)  Using a butter knife, spread the rub all over the pork (top and the sides).
4)  Place broiler pan on the middle rack (2nd rack). Leave the broiler door slightly ajar and broil pork until the top is nicely charred, about 2 minutes.
◘ tip: Check and take a peek after 1 minute. Do not let the rub burn.
5)  Remove broiler pan from the broiler compartment. Let pork rest for 10 minutes, then slice pork ¼ to ½-inch thick. Serve and enjoy!
Recommended Side Dishes:
○ Lettuce of your choice, rice, kimchi, sliced garlic, scallions, chili peppers, pickled daikon, saeujeot, ssamjang, etc.
My Side Dishes and How to Eat:
○ Hydroponic butter lettuce, rice, store-bought ssamjang, and sliced scallions.
○ Place a lettuce leaf in your hand, add in some rice, smear some ssamjang on the rice, top with a slice of pork, and finish with some scallions. Wrap it all together, take a bite or two and enjoy!
◘ note: One hour after simmering the pork, strain the cooking liquid into a large bowl. Add 2 cups of broth in a freezer zip top bag, squeeze the air out, seal the bag, and place in the freezer for later use. This made 2 bags with 2½ cups broth and 1 bag with 2 cups broth. The broth can be used to make a delicious ramen! Recipe here.
DSC04660 DSC04673DSC04666 DSC04669DSC04683 DSC04685DSC04689 DSC04684DSC04692 DSC04694DSC04703 DSC04707DSC04709 DSC04714DSC04715