Sunday, March 15, 2015

Pineapple-Raspberry Glazed Chicken recipe

That glaze is a must! I gave my chicken skin to my husband and he saved all the skin (which had all the glaze) for the last bite! He absolutely loved that dinner! I served this with rice and Bacon-Wrapped Asparagus with Lemon Butter Sauce. It was oh so delicious! Ask both my hubby and kid if you don't believe me. Better yet, just try it for yourself!

Pineapple-Raspberry Glazed Chicken
For the Chicken
ingredients:
• 6 chicken thighs, skin-on & bone-in
• 1 tbsp sun dried tomatoes, chopped (packed in oil & Italian herbs)
• 3 tbsp red wine vinegar, preferably aged
• 1 tbsp extra virgin olive oil
• 1 tbsp balsamic vinegar
• 1 tbsp Dijon mustard
• 1 tsp kosher salt + more for sprinkling
• freshly ground black pepper + more for sprinkling
instructions:
1)  Line a 13x9 baking dish with foil for easy clean up. Put the chicken in a zip top bag and place it in the baking dish.
2)  Whisk the rest of the ingredients in a bowl (including all the oil accumulated on the cutting board from the sun dried tomatoes), then pour it over the chicken. Reseal the bag, squeezing as much air as you can out of it, and massage the marinade into the chicken. Refrigerate to marinate for at least 4 hours to overnight, turning the bag occasionally. Remove the dish from the fridge 1 hour before cooking to bring chicken to room temperature.
3)  Preheat oven to 400° F. Dump the chicken in the prepared baking dish along with any marinade left in the bag. Arrange chicken in a single layer and skin side up. Cover the dish tightly with foil. Bake for 30 minutes. Meanwhile, make the glaze (recipe follows).
4)  Remove the foil. Sprinkle the top with salt and pepper. Bake uncovered for another 30 minutes.
5)  Brush the glaze over the chicken and bake for 10 more minutes. Let rest for 5 minutes before serving.
For the Glaze
ingredients:
• 6 oz can pineapple juice, shaken well (Dole)
• 1/3 cup raspberry seedless spreadable fruit (Polaner)
• 2 tsp orange liqueur (Grand Marnier)
• 1 tsp balsamic vinegar
instructions:
1)  Add all the ingredients in a small saucepan and place it over low heat. Stir/whisk the mixture until the raspberry melts, then stir every few minutes thereafter.
2)  Cook until the mixture reaches the ribbon stage and becomes a glaze consistency, about 30-40 minutes. Turn off the heat.
3)  Brush the glaze over the chicken.

DSC05841 DSC05853DSC05861 DSC05868DSC05871 DSC05885

Thursday, March 12, 2015

Pico de Gallo recipe

I love pico de gallo!
Fun Fact: Whenever I make a juicy pico de gallo, I drink the juice! I'm not sure if that's a fun fact or an embarrassing one!

Pico de gallo or salsa fresca is so versatile. Chips and salsa, anyone? How about pico de gallo in your burrito, tacos, nachos, or fajitas? Or my favorite one: Grilled New York Strip Steak with Smokey Israeli Couscous and a side of Pico de Gallo.

Depending on the level of your tolerance for spicy things, you may have to completely remove all the seeds and ribs (capsaicin glands or placenta, you stickler!) of the jalapeño. You can experiment and find which chili pepper you like best in your pico de gallo, like serrano pepper. What about onions? You can use red, yellow, or white onions. Avoid Vidalia onions as they are a bit sweeter. I personally prefer yellow onions, and really, I wouldn't change a thing about my recipe (because I've experimented quite a lot already and this is the one for me).

Note: The longer the salsa sits, the juicier it gets even if you've scraped all the pulp out of the tomatoes in the beginning. You can pour the juice out if you want to, though I would recommend against it because that's tossing some of the flavors out.

Pico de Gallo
ingredients:
• 2 Roma tomatoes (about 1 cup)
• half of a small onion (about 1/3 cup)
• 1 jalapeño
• 1 lime, juiced
• ¾ tsp kosher salt
• 2 tbsp cilantro, finely chopped
instructions:
1)  Cut the tomatoes in half and scrape out all the seeds/pulp using a spoon. Dice the tomatoes.
2)  Dice the onion.
3)  Remove the stem and cut the jalapeño in half. Scrape the seeds out of one half, but leave the seeds intact in the other. Dice the jalapeño.
4)  Mix all the ingredients in a bowl.
◘ note: For a juicier salsa, do not remove the tomato pulp. Adjust salt to taste, if needed.
DSC04969 DSC04972DSC04970 DSC04975DSC04985 DSC04986

Monday, March 9, 2015

Japchae recipe

Japchae is a Korean noodle dish, often served at family gatherings and festive occasions. It can be served as the main dish, or as a side over a bed of rice. Traditionally, the meat and each vegetable is stir-fried separately. But who has time for that nowadays? I made an easier version and I think you'll appreciate that.

I often see Japchae with beef, but honestly, I prefer it with chicken. I've never seen Japchae with chicken so I decided it was my mission to introduce the the two-legged creature to this popular Korean dish. I also think that Japchae is a lot tastier when it isn't too sweet. My husband thinks the same and he also likes it spicy, so he drizzles Sriracha on his. Don't ask me what that taste like, I haven't tried it.

In the pictures below, I show you the 2 different versions. One with beef and sesame seeds, and one with chicken.

A couple of notes:
- I only use toasted/roasted sesame oil. Read the ingredients on the label.
- I used Kikkoman Less Sodium Soy Sauce.
- To toast sesame seeds, put seeds in a dry pan and place it over medium heat. Toss often to prevent it from burning. Once it starts to pop, reduce heat to low and continue to toast until fragrant and golden brown, stirring the seeds the whole time.

Japchae
For the Steak or Chicken
ingredients:
• 1 lb sirloin steak or thin sliced chicken breast
• 2 tbsp low sodium soy sauce
• 2 tsp brown sugar
• 2 tsp sesame oil
• 1 tsp mirin
• ¼ tsp ground black pepper
• 2 tsp toasted sesame seeds (optional)
instructions:
1)  For the steak: Partially freeze steak by putting it in the freezer for 30 minutes. After that, thinly slice steak against the grain and on a bias and into 2-inch length strips.
For the chicken: Slice chicken into 2-inch length strips.
2)  Put the meat in a bowl. Add the rest of the ingredients and massage the marinade into the meat. Let marinate for 30 minutes to 1 hour on the kitchen counter, or cover with plastic wrap and refrigerate to marinate longer. It's best to marinate for at least 4 hours.
◘ tip: If marinating in the fridge, remove the meat out of the fridge to bring to room temperature 15 minutes before cooking.
For the Noodle
ingredients:
• 1 bundle dangmyeon (sweet potato starch noodles)
• water
• 2 tbsp low sodium soy sauce
• 1 tsp sesame oil
• ¼ tsp ground black pepper
instructions:
1)  Bring a pot of water to a boil over medium-high heat. Add the noodles and cook for 4 minutes. Drain noodles and rinse under cold running water for 3 seconds.
2)  Put noodles back in the pot, then season with soy sauce, sesame oil, and ground black pepper; toss to coat. Using kitchen shears, cut the noodles several times. Set aside until ready to use.
For the Omelette
ingredients:
• 2 eggs, beaten
• sea salt or kosher salt, to taste
• freshly ground black pepper, to taste
• Korean chili flakes (gochugaru/kochukaru), to taste
• non-stick spray
instructions:
1)  Spray a skillet with non-stick spray and place it over low heat. Pour in the eggs and swirl the pan to ensure eggs are laid evenly on the pan. Sprinkle the top with salt, ground black pepper, and gochugaru. Cook for 5 minutes or until eggs are set. Let cool in the pan until ready to use.
Japchae Vegetables
ingredients:
• 2 tbsp grapeseed oil (or any neutral, high smoke point oil such as canola)
• half of an onion, sliced
• 1 leek, chopped & rinsed (white & light green parts only)
• 1 carrot, julienned
• 4 garlic cloves, minced
• 5 oz sliced shiitake mushrooms
• 1 zucchini, cut to half moons
• 5 oz baby spinach
• 4 oz bean sprouts
• 2 tbsp low sodium soy sauce
• 1 tbsp sesame oil
• 1 tbsp brown sugar
• 1 tsp kosher salt, divided use
• 1 tsp ground black pepper
• 3 scallions, cut to 1-inch length
instructions:
1)  Heat oil in a wok or a large pan over medium heat. Add onions, leek, carrot, shiitake, garlic, and ½ tsp salt; cook for 5 minutes.
2)  Increase heat to medium-high and move all the veggies to the sides creating a hole in the middle for the meat. Add meat, including any marinade left in the bowl. Let the meat sit for 1 minute before tossing it around with the veggies; cook for 2 minutes.
3)  Reduce heat back to medium and move everything to the sides again. Add zucchini, baby spinach, bean sprouts, soy sauce, sesame oil, brown sugar, ½ tsp salt, and ground black pepper. Cook for 3 minutes or just until spinach is wilted.
4)  Add dangmyeon; cook for 1 minute to heat through. Add scallions and cook for 1 more minute.
To Assemble:
○ Slide the omelette onto a cutting board. Roll it up then slice.
○ To serve family-style, transfer Japchae to a serving platter and garnish with omelette rolls. For individual servings, add a serving of Japchae in a dish and garnish with a few omelette rolls.
○ Garnish with toasted sesame seeds and sliced scallions, if desired.
○ Serve with rice and slivers of chili, if desired.

DSC05079 DSC05712DSC05714 DSC05076DSC05077 DSC05086DSC05721 DSC05722DSC05718 DSC05090DSC05724 DSC05099DSC05726 DSC05727DSC05728 DSC05729japchae with beef japchae with chicken

Thursday, March 5, 2015

Cannoli Cream recipe

Sorry for the long absence. We were out of town for a little over a week, out of country to be exact! We enjoyed our little vacation :) You should go on one to recharge and hopefully be stress-free while away. Since I'm in a good mood, I decided to post something sweet ;)

There is nothing wrong with shortcuts, I welcome them if they will make my life easier! We are gonna do Cannoli Cream two ways and having store-bought cannoli shells and pie crust surely cuts preparing time more than half! But hey, if you really want to, go knock yourself out and make your own cannoli shells and pie crust. No one's stopping you.

I've used both regular size and mini cannoli shells. You'll see pictures of both below the recipe. By the way, cannoli is plural of cannolo/cannolu. The more you know..


Cannoli Cream
Cannoli
For the Filling
ingredients:
• 32 oz whole milk ricotta cheese
• 1¹⁄3 cup powdered sugar (confectioners sugar)
• 1 tbsp + 1 tsp vanilla extract
• 1 tbsp Grand Marnier orange liqueur
• ¼ tsp ground cinnamon
• 1 cup semi-sweet chocolate chips
other ingredients:

• cheese cloth
• 24 mini cannoli shells, store-bought
• powdered sugar for garnish
• cocoa powder for garnish
• mini chocolate chips for garnish
instructions:
1)  Place a strainer over a bowl then place a cheese cloth over the strainer. Add the ricotta cheese and fold the edges of cheese cloth over the cheese. Put a salad plate over the top and cover with plastic wrap. Let strain in the fridge 1 day prior to making the cannoli.
2)  The next day, transfer the strained ricotta into a bowl. Add powdered sugar, vanilla extract, orange liqueur, and cinnamon; whisk until smooth, but avoid overmixing. Place a plastic wrap directly on the filling and chill for at least 4 hours.
3)  Fold the chocolate chips into the filling. Scoop some filling into a zip top bag, seal the bag, and cut off one corner tip.
◘ tip: The hole should be fairly small -- big enough to let chocolate chips pass through but not so small that chips clog the hole.
4)  Pipe filling into the cannoli shells. Garnish the edges with mini chocolate chips. Spoon a bit of powdered sugar and cocoa powder in a small strainer and dust this mixture over the top of cannoli.
◘ note: Save the rest of the filling to make the pie (recipe follows). Place a plastic wrap directly on the filling and refrigerate until needed (2 days max).
Cannoli Cream Pie with Nutella
ingredients:
• leftover cannoli cream filling
• 9-inch frozen regular pie crust, store-bought
• ¼ cup Nutella
instructions:
1)  Preheat oven to 325° F.
2)  Put Nutella in a small bowl (or keep it in the measuring cup) then place this bowl over another bowl of hot water. Replace hot water when it starts to cool until Nutella softens.
◘ note: I placed the Nutella on top of the stove as the oven is located under it. The heat was enough to soften the Nutella.
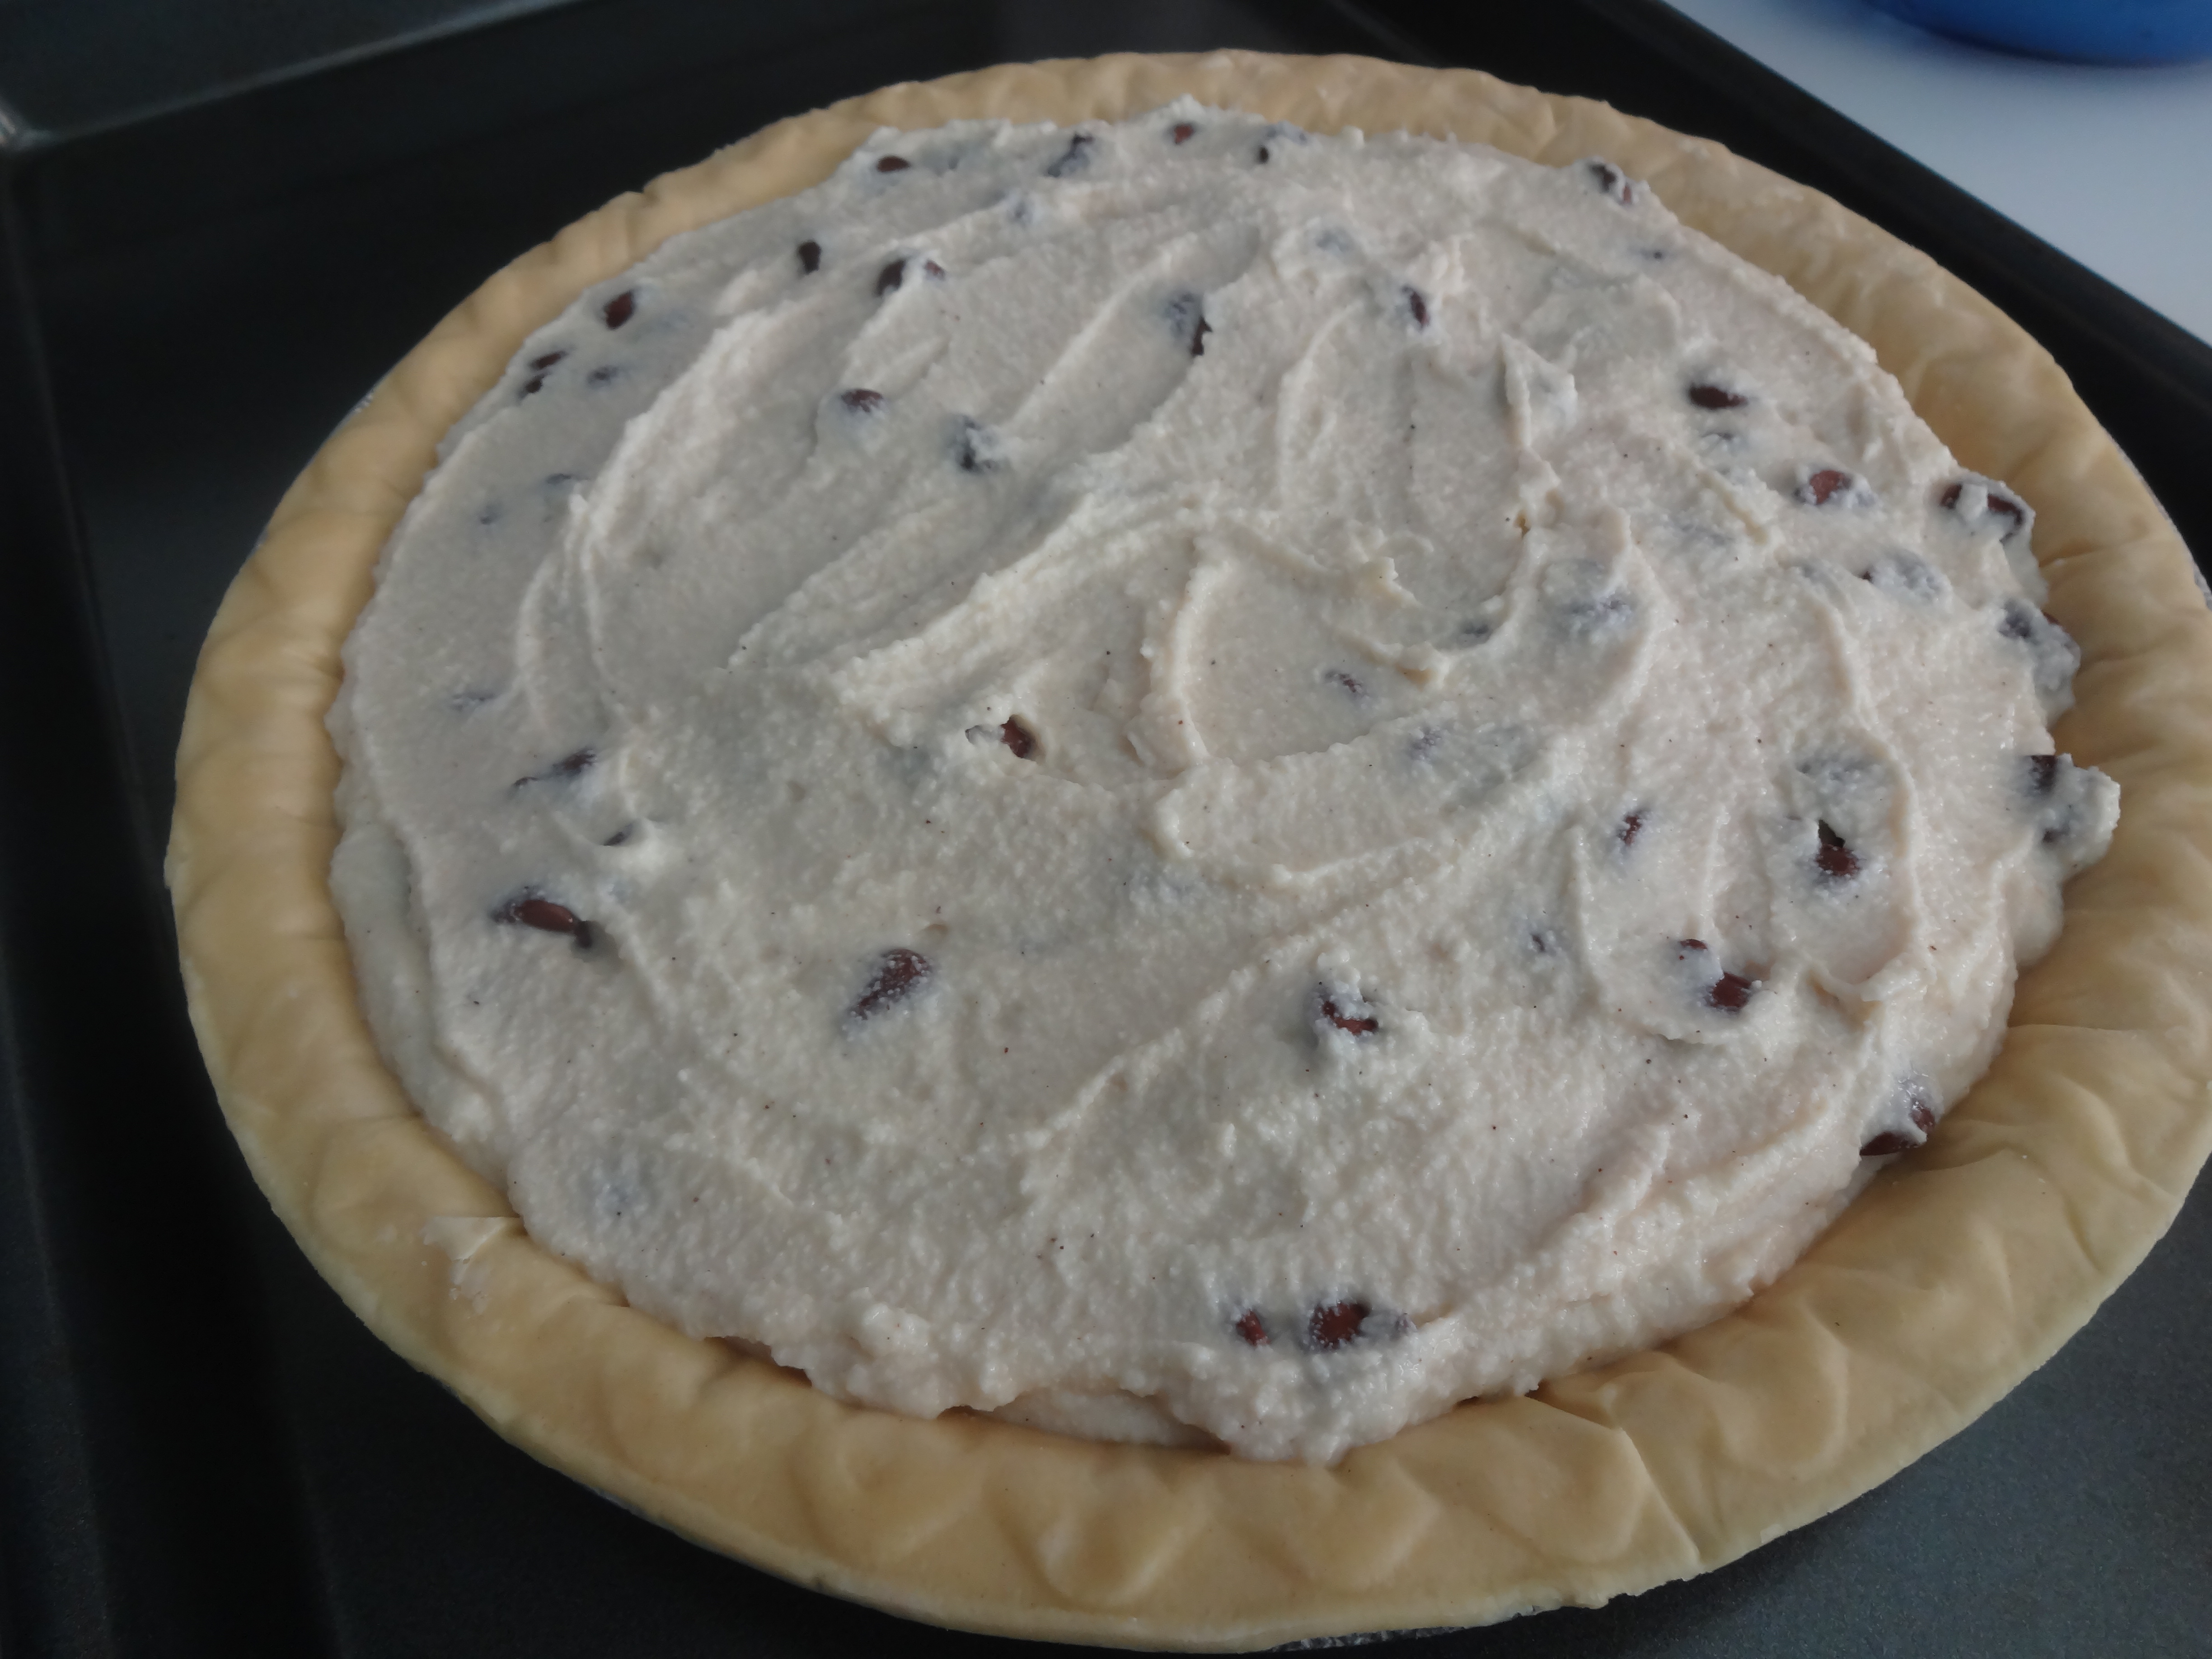
3)  Give the leftover filling a final stir, then pour filling into frozen pie crust.
4)  Transfer softened Nutella into a small zip top bag, cut a small tip off one corner, and pipe this onto the pie -- decorating it however you like.
5)  Place the pie over a sheet pan and bake for 50 minutes.
◘ note: The pie will rise in the last 10-15 minutes, but it will return to normal as it cools.
6)  Transfer the pie to a cooling rack, let cool for 1 hour. Put the cooled pie in the fridge and chill for at least 6 hours before cutting into it.


Cannoli
DSC03932 DSC03977DSC03886 DSC03887DSC03888 DSC03890DSC03893 DSC03895DSC03897 DSC03898DSC03899 DSC03936DSC03937 DSC03938DSC03939 DSC03952DSC05412
Cannoli Cream Pie with Nutella
DSC05170 DSC05171DSC05172 DSC05179DSC05200 DSC05234